LaTex是科研写作中常见的排版工具。爱思唯尔期刊提供了Latex模板,使用该模板可简化在投稿过程中关于稿件的排版过程,在编译过后就能得到期刊认可的排版格式。
不少期刊都已经采用了“Your paper your way”的投稿方式,即根据作者的喜好的排版方式提交稿件,在接收后排版成期刊的要求的格式即可,但也提供了Latex模板。https://www.elsevier.com/researcher/author/policies-and-guidelines/latex-instructions
尽管内容大于形式,红楼梦手抄一万遍也是经典,我的博客打印出来也只是我的博客 ,
请注意:阅读本文需要一定Latex使用经验,且本文只针对爱思唯尔期刊Latex模板elsarticle有效。
1 2 3 \usepackage [authoryear]{natbib}
该宏包是elsarticle自带的引用格式的宏包,一般我选择使用第三个[authoryear]参数。
lineno是行号宏包,投稿时如需加行号则使用此宏包。不推荐使用双列模板 ,除非没有长公式或者长图、长表等等,
1 \usepackage {threeparttable}
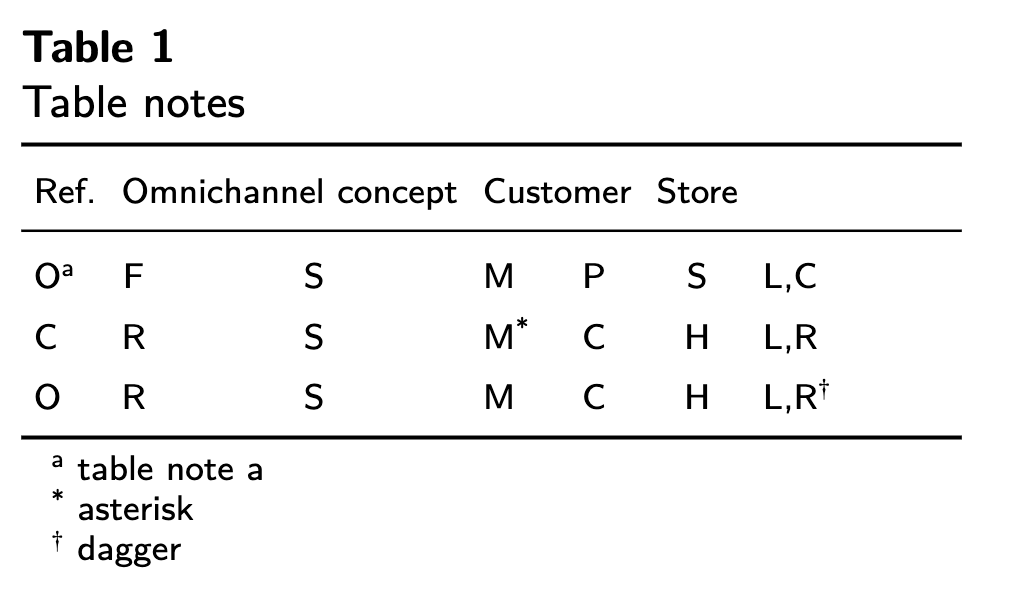
threeparttable可以实现表格以及表格下方的注释,十分好用。
1 \usepackage [ruled,linesnumbered]{algorithm2e}
algorithm2e是算法伪代码的常用宏包。
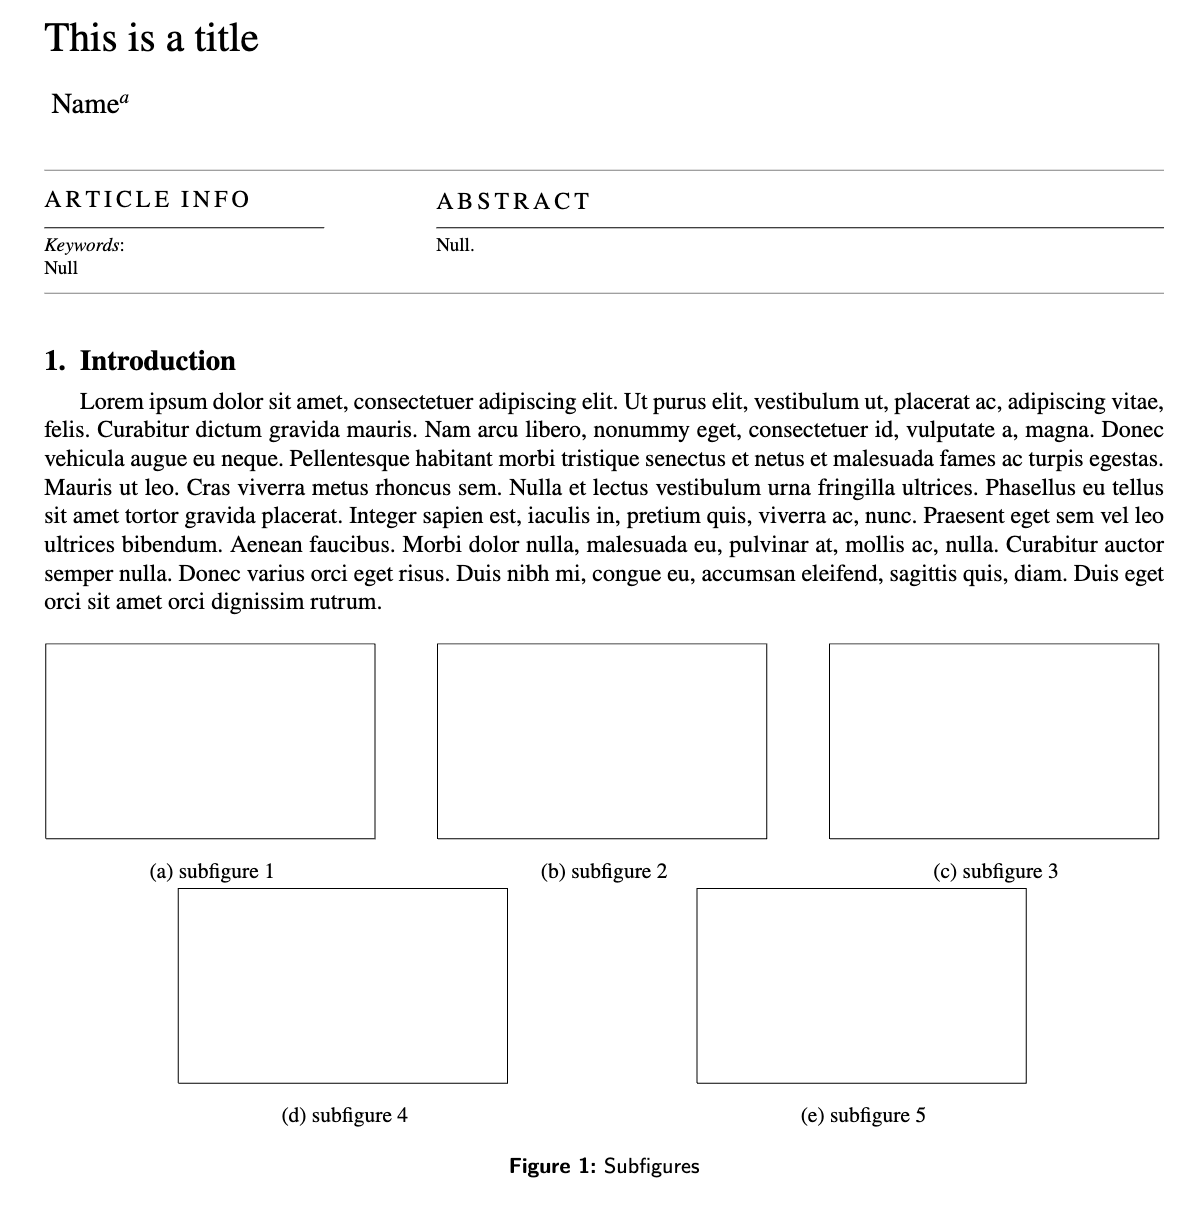
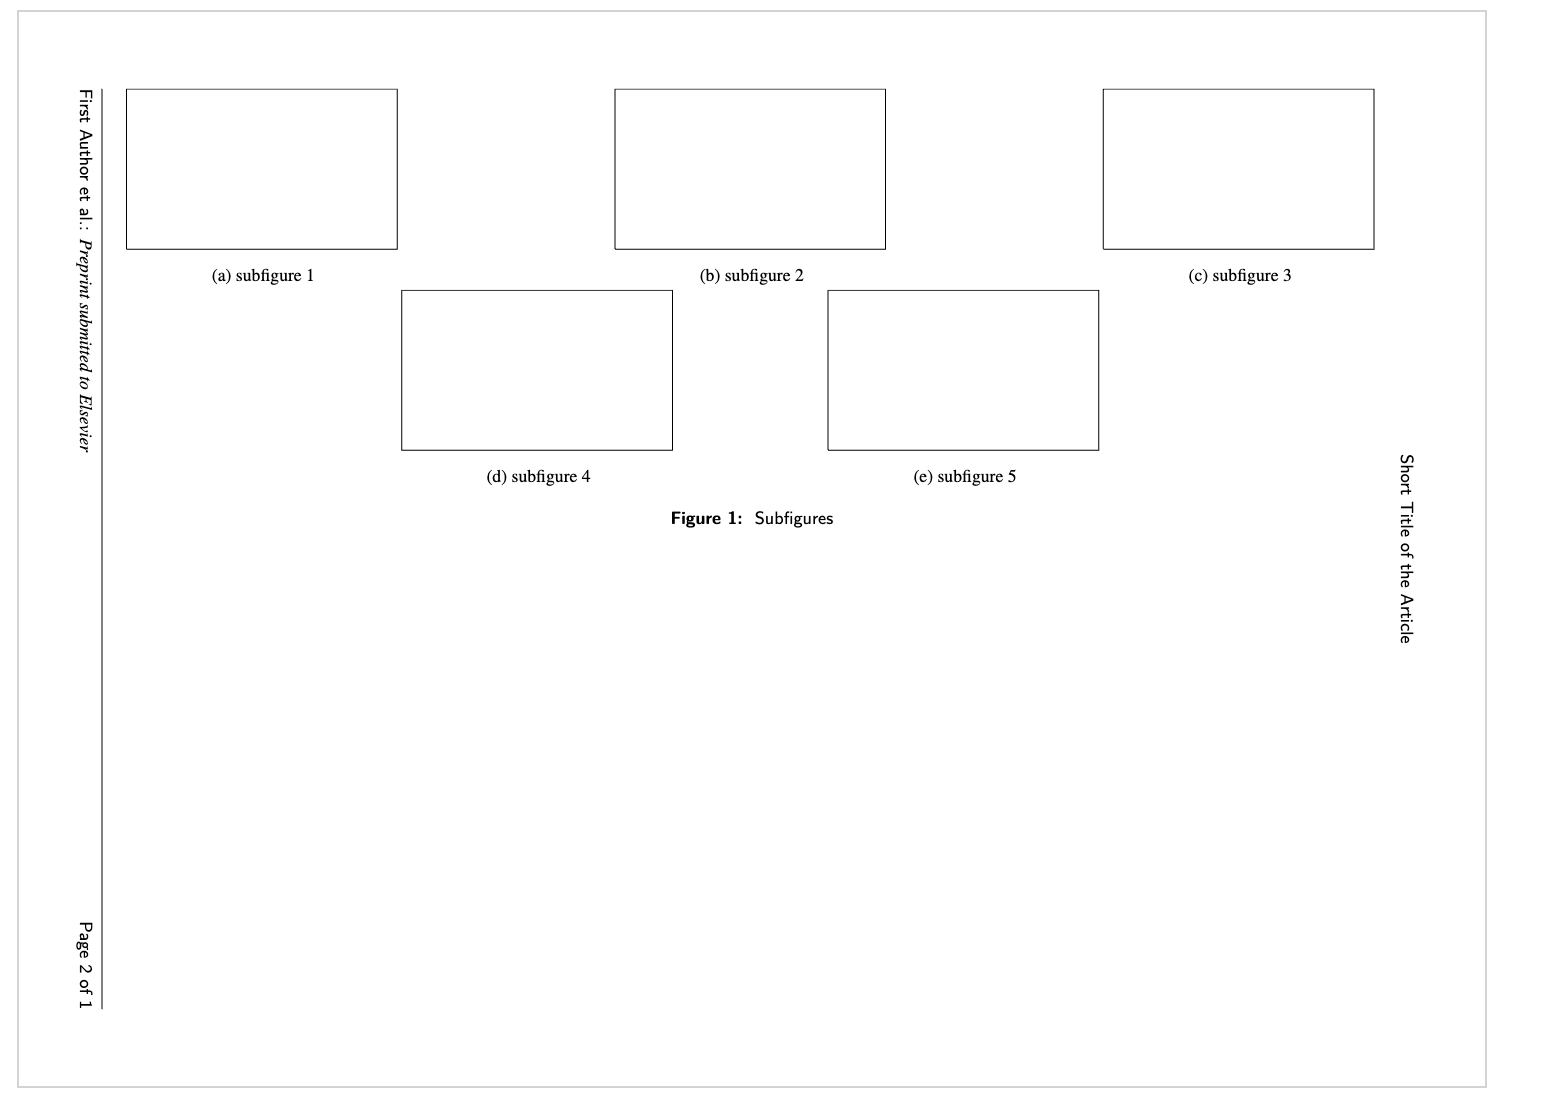
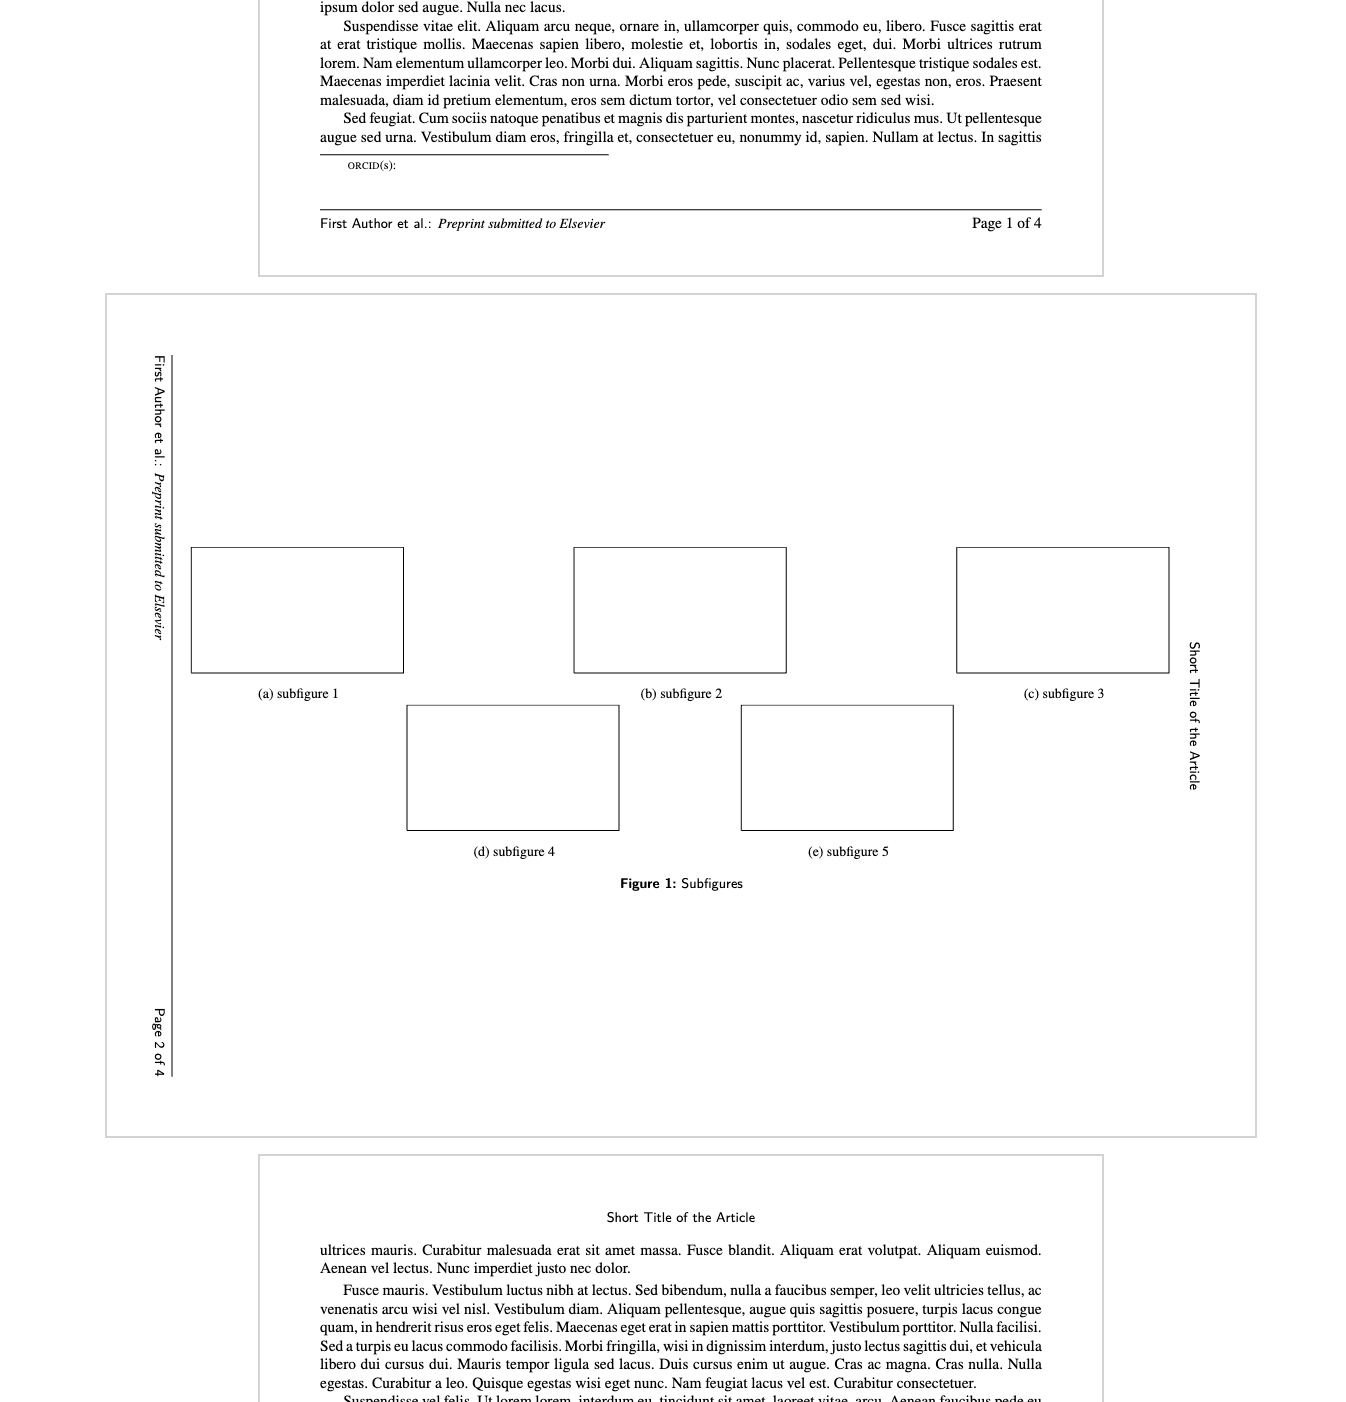
subcaption 可以实现子图
1 \usepackage [nameinlink,capitalize]{cleveref}
cleveref 实现交叉引用带label名字,比如Section 1, 而不是使用\ref仅引用一个数字。该宏包最好放在所有宏包命令的最后
pdflscape是某页横置的包,支持pdf旋转,比landscape更好一些。landscape编译出来后,pdf内容是横置的,但是页面仍是竖置,而pdflscape的页面也是横置的。
midpage配合pdflscape使用,可以使用横置的内容位于页面的垂直方向的中心(垂直居中)。\centering使用,就是页面的正中心。
afterpage配合pdflscape使用,可避免pdflscape使用前后文章出现大面积空白(因为pdflscape在哪里使用就在哪里分页)。
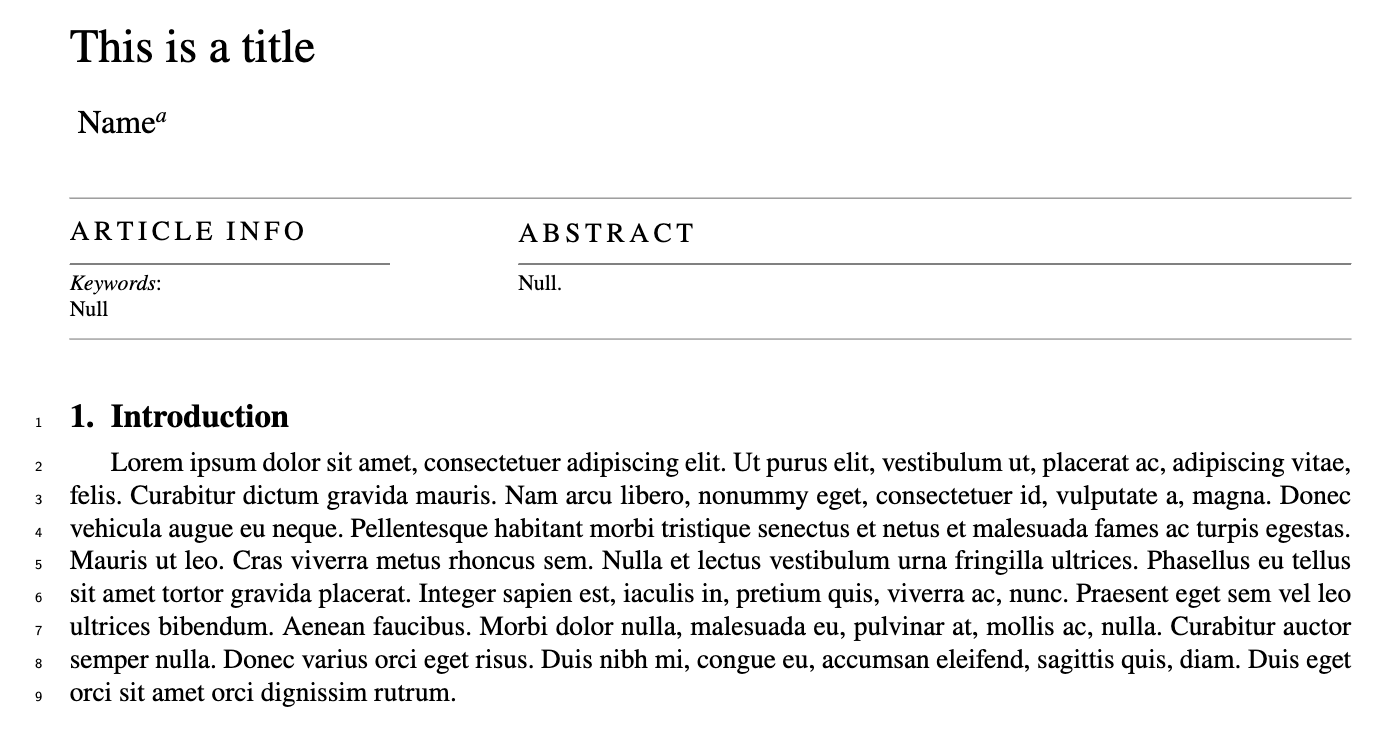
Minimal Working Example (MWE) 是Latex是一个精简到最小长度的.tex文件。是一个可以运行的,最简短的tex文件。MWE或者elsarticle的cas-sc-sample.tex文件进行展示。lipsum宏包生成随机文本
lineno展示行号使用了lineno宏包,代码如下:
1
2
3
4
5
6
7
8
9
10
11
12
13
14
15
16
17
18
19
20
21
22
23
24
25
26
27
28
\documentclass [a4paper,fleqn]{cas-sc}\usepackage {lipsum}\usepackage {lineno}\begin {document}\let \WriteBookmarks \relax \def \floatpagepagefraction {1}\def \textpagefraction {.001}\title [mode = title]{This is a title} \author [1]{Name}[]\begin {abstract} Null. \end {abstract}\begin {keywords} Null \end {keywords}\maketitle \linenumbers \section {Introduction}\lipsum [1]\end {document}
\linenumbers命令放在节标题前面就可以生成行号了,结果如下:
threeparttable在表格展示结果的过程中总会有需要在表格下方注释的情况,使用threeparttable宏包可满足该需求。
1
2
3
4
5
6
7
8
9
10
11
12
13
14
15
16
17
18
19
20
21
22
23
24
25
26
27
28
29
30
31
32
33
34
35
36
37
38
39
40
41
42
43
44
45
46
47
48
49
50
51
52
53
54
\documentclass [a4paper,fleqn]{cas-sc}\usepackage {lipsum}\usepackage {threeparttable}\begin {document}\let \WriteBookmarks \relax \def \floatpagepagefraction {1}\def \textpagefraction {.001}\title [mode = title]{This is a title} \author [1]{Name}[]\begin {abstract} Null. \end {abstract}\begin {keywords} Null \end {keywords}\maketitle \section {Introduction}\lipsum [1]\begin {table}[width=0.4\textwidth , pos=thb]\scriptsize \tabcolsep =2.5pt\renewcommand \arraystretch {1.5}\centering \caption {Table notes}\label {tb:review}\begin {threeparttable} \begin {tabular*}{\tblwidth }{lcclccl} \toprule Ref. & \multicolumn {2}{c}{Omnichannel concept} & \multicolumn {2}{l}{Customer} & \multicolumn {1}{l}{Store} \\ \midrule O\tnote {a} & F & S & M & P & S & L,C \\ C & R & S & M\tnote {*} & C & H & L,R \\ O & R & S & M & C & H & L,R\tnote {$ \dagger $ } \\ \bottomrule \end {tabular*} \begin {tablenotes} \scriptsize \item [a] table note a \item [*] asterisk \item [$ \dagger $ ] dagger \end {tablenotes} \end {threeparttable}\end {table}\end {document}
这会生成一个带有注释的表格。
请参考Overleaf的伪代码包,写的非常详细。https://www.overleaf.com/learn/latex/Algorithms
subcaption使用子图,只需要引用subcaption宏包即可,子图换行使用\\即可。
1
2
3
4
5
6
7
8
9
10
11
12
13
14
15
16
17
18
19
20
21
22
23
24
25
26
27
28
29
30
31
32
33
34
35
36
37
38
39
40
41
42
43
44
45
46
47
48
49
50
51
52
53
54
55
56
57
58
59
60
61
\documentclass [a4paper,fleqn]{cas-sc}\usepackage {lipsum}\usepackage {subcaption}\begin {document}\let \WriteBookmarks \relax \def \floatpagepagefraction {1}\def \textpagefraction {.001}\title [mode = title]{This is a title} \author [1]{Name}[]\begin {abstract} Null. \end {abstract}\begin {keywords} Null \end {keywords}\maketitle \section {Introduction}\lipsum [1]\begin {figure}[pos = htb] \centering \begin {subfigure}{0.3\textwidth } \includegraphics [width=\textwidth ]{figs/cas-grabs.pdf} \caption {subfigure 1} \label {subfig:routes} \end {subfigure} \hfill \begin {subfigure}{0.3\textwidth } \includegraphics [width=\textwidth ]{figs/cas-grabs.pdf} \caption {subfigure 2} \label {subfig:cycle} \end {subfigure} \hfill \begin {subfigure}{0.3\textwidth } \includegraphics [width=\textwidth ]{figs/cas-grabs.pdf} \caption {subfigure 3} \label {subfig:aggregate} \end {subfigure} \\ \begin {subfigure}{0.3\textwidth } \includegraphics [width=\textwidth ]{figs/cas-grabs.pdf} \caption {subfigure 4} \label {subfig:assign} \end {subfigure} \hspace {0.15\textwidth } \begin {subfigure}{0.3\textwidth } \includegraphics [width=\textwidth ]{figs/cas-grabs.pdf} \caption {subfigure 5} \label {subfig:newroute} \end {subfigure} \caption {\label {fig:aggr} Subfigures} \end {figure}\end {document}
这会生成一个两行子图,第一行有3张,第二行有2张。
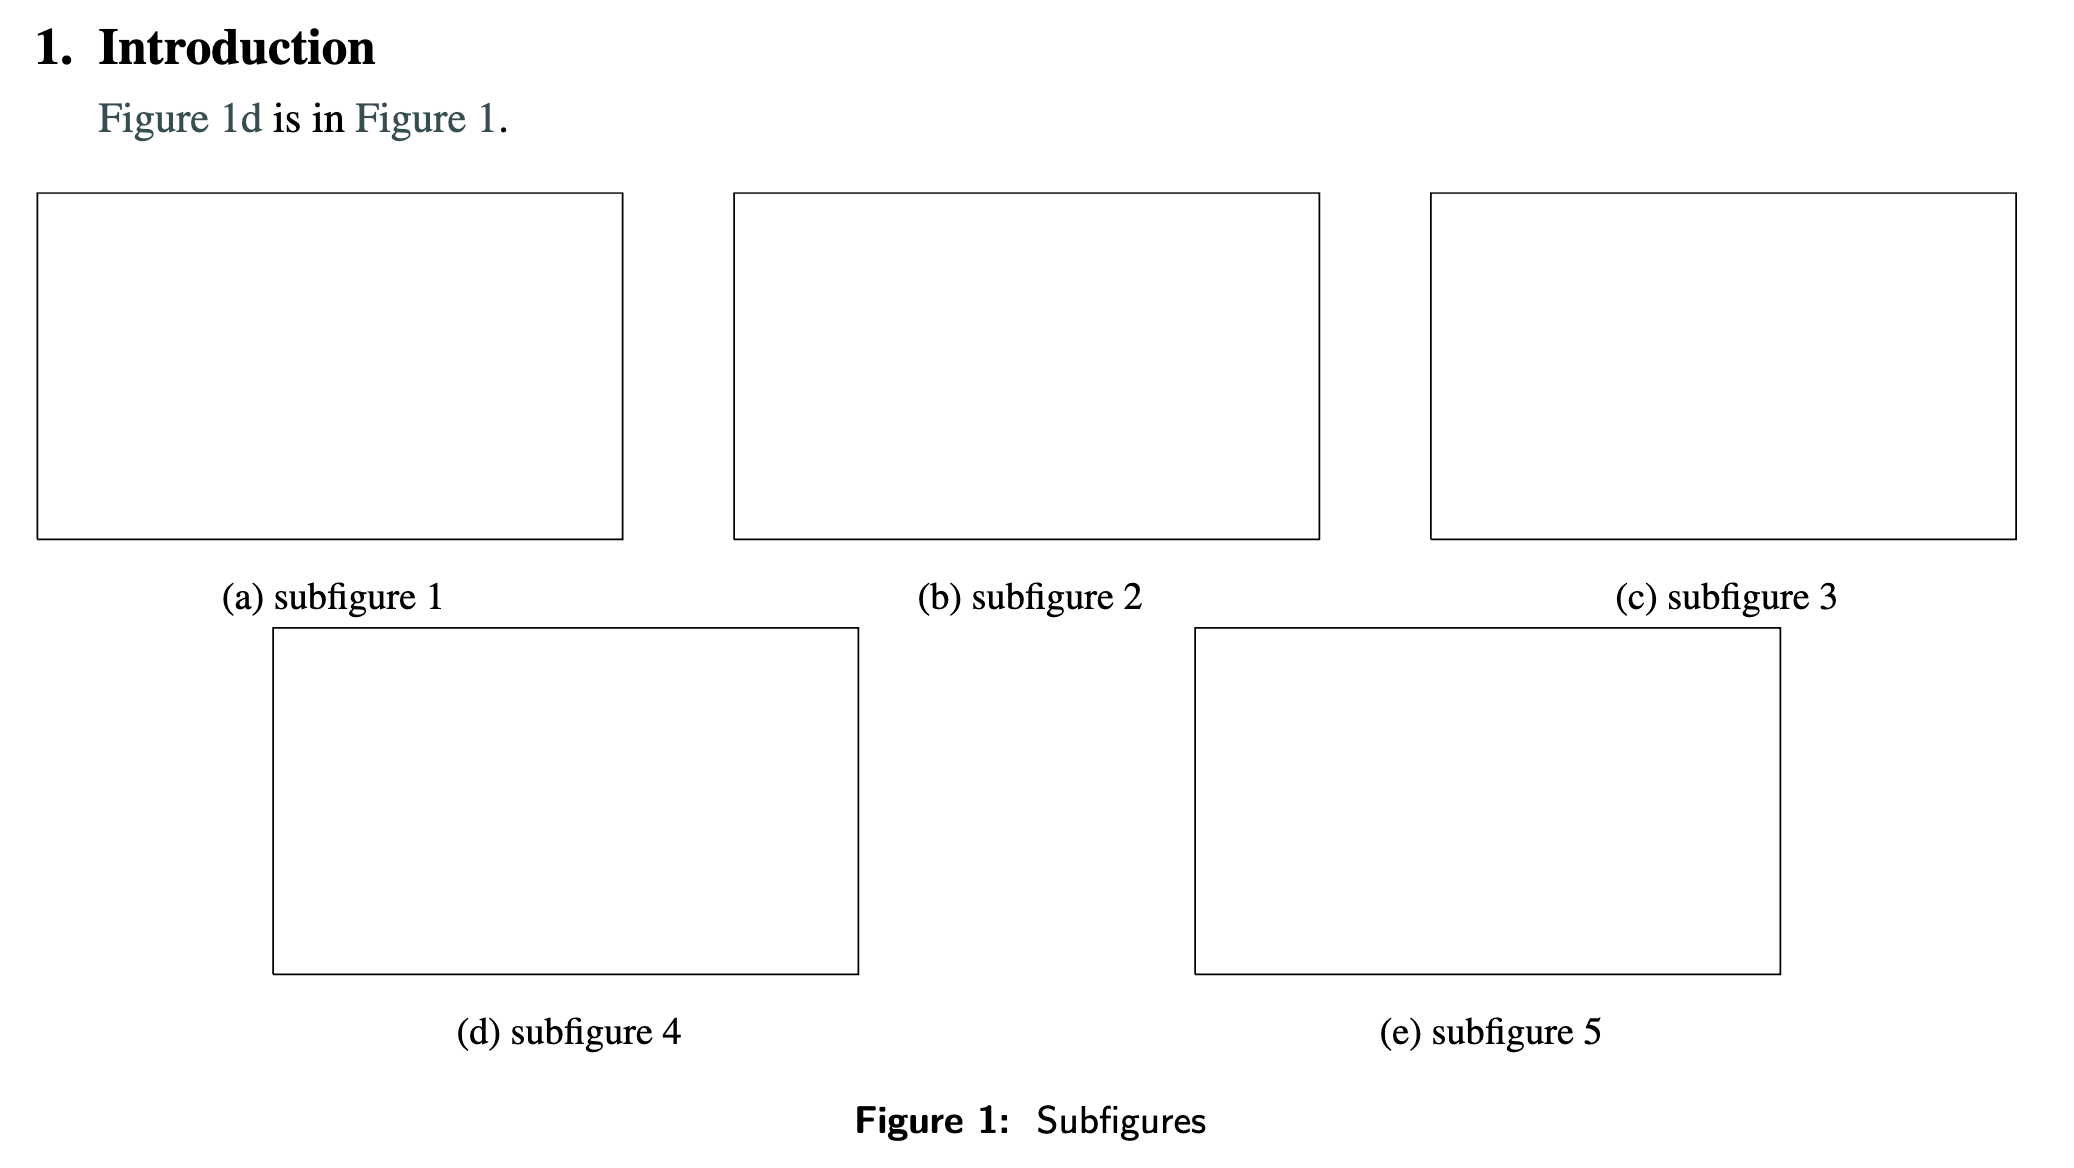
cleveref交叉引用是Latex一个重要的功能,自带的\ref功能只能引用数字,生成出来的效果并不好看,比如“Section 1.1 ”, 而不是期刊常见的“Section 1.1 ”。使用cleveref宏包解决这个问题。
1
2
3
4
5
6
7
8
9
10
11
12
13
14
15
16
17
18
19
20
21
22
23
24
25
26
27
28
29
30
31
32
33
34
35
36
37
38
39
40
41
42
43
44
45
46
47
48
49
50
51
52
53
54
55
56
57
58
59
60
61
62
63
\documentclass [a4paper,fleqn]{cas-sc}\usepackage {lipsum}\usepackage {subcaption}\usepackage [nameinlink,capitalize]{cleveref}\begin {document}\let \WriteBookmarks \relax \def \floatpagepagefraction {1}\def \textpagefraction {.001}\title [mode = title]{This is a title} \author [1]{Name}[]\begin {abstract} Null. \end {abstract}\begin {keywords} Null \end {keywords}\maketitle \section {Introduction}\Cref {subfig:assign} is in \Cref {fig:aggr}. \begin {figure}[pos = htb] \centering \begin {subfigure}{0.3\textwidth } \includegraphics [width=\textwidth ]{figs/cas-grabs.pdf} \caption {subfigure 1} \label {subfig:routes} \end {subfigure} \hfill \begin {subfigure}{0.3\textwidth } \includegraphics [width=\textwidth ]{figs/cas-grabs.pdf} \caption {subfigure 2} \label {subfig:cycle} \end {subfigure} \hfill \begin {subfigure}{0.3\textwidth } \includegraphics [width=\textwidth ]{figs/cas-grabs.pdf} \caption {subfigure 3} \label {subfig:aggregate} \end {subfigure} \\ \begin {subfigure}{0.3\textwidth } \includegraphics [width=\textwidth ]{figs/cas-grabs.pdf} \caption {subfigure 4} \label {subfig:assign} \end {subfigure} \hspace {0.15\textwidth } \begin {subfigure}{0.3\textwidth } \includegraphics [width=\textwidth ]{figs/cas-grabs.pdf} \caption {subfigure 5} \label {subfig:newroute} \end {subfigure} \caption {\label {fig:aggr} Subfigures} \end {figure}\end {document}
这会生成一个带引用类型的交叉引用格式。
pdflscape midpage afterpage横置一个pdf页码可以解决某个表格或者图太长的问题,使用pdflscape可以将某一页横置,以放下这些图表。
1
2
3
4
5
6
7
8
9
10
11
12
13
14
15
16
17
18
19
20
21
22
23
24
25
26
27
28
29
30
31
32
33
34
35
36
37
38
39
40
41
42
43
44
45
46
47
48
49
50
51
52
53
54
55
56
57
58
59
60
61
62
63
64
\documentclass [a4paper,fleqn]{cas-sc}\usepackage {lipsum}\usepackage {subcaption}\usepackage {pdflscape} \usepackage [nameinlink,capitalize]{cleveref}\begin {document}\let \WriteBookmarks \relax \def \floatpagepagefraction {1}\def \textpagefraction {.001}\title [mode = title]{This is a title} \author [1]{Name}[]\begin {abstract} Null. \end {abstract}\begin {keywords} Null \end {keywords}\maketitle \section {Introduction}\Cref {subfig:assign} is in \Cref {fig:aggr}. \begin {landscape} \begin {figure}[pos = htb] \centering \begin {subfigure}{0.3\textwidth } \includegraphics [width=\textwidth ]{figs/cas-grabs.pdf} \caption {subfigure 1} \label {subfig:routes} \end {subfigure} \hfill \begin {subfigure}{0.3\textwidth } \includegraphics [width=\textwidth ]{figs/cas-grabs.pdf} \caption {subfigure 2} \label {subfig:cycle} \end {subfigure} \hfill \begin {subfigure}{0.3\textwidth } \includegraphics [width=\textwidth ]{figs/cas-grabs.pdf} \caption {subfigure 3} \label {subfig:aggregate} \end {subfigure} \\ \begin {subfigure}{0.3\textwidth } \includegraphics [width=\textwidth ]{figs/cas-grabs.pdf} \caption {subfigure 4} \label {subfig:assign} \end {subfigure} \hspace {0.15\textwidth } \begin {subfigure}{0.3\textwidth } \includegraphics [width=\textwidth ]{figs/cas-grabs.pdf} \caption {subfigure 5} \label {subfig:newroute} \end {subfigure} \caption {\label {fig:aggr} Subfigures} \end {figure} \end {landscape}\end {document}
这会得到一个横置的页面,注意到这个页面是横置的,所有的内容在页面的上方,下一步是把这些图片垂直居中。landscape和figure环境之间套一层midpage环境即可。
1
2
3
4
5
6
7
8
9
10
11
12
13
14
15
16
17
18
\documentclass [a4paper,fleqn]{cas-sc}\usepackage {lipsum}\usepackage {subcaption}\usepackage {pdflscape} \usepackage {midpage}\begin {document}\begin {landscape} \begin {midpage} \begin {figure}[pos = htb] ... 图表代码 \end {figure} \end {midpage} \end {landscape}\end {document}
得到居中的插图:
但是,横置页前后的文字会因为横置页突然打断,出现大面积空白。这时还需要afterpage宏包,使得横置页平滑插入到文字中,用\afterpage{}命令把landscape环境包裹起来。
1
2
3
4
5
6
7
8
9
10
11
12
13
14
15
16
17
18
\documentclass [a4paper,fleqn]{cas-sc}\usepackage {lipsum}\usepackage {subcaption}\usepackage {pdflscape} \usepackage {midpage}\begin {document}\afterpage { \begin {landscape} \begin {midpage} \begin {figure}[pos = htb] ... 图表代码 \end {figure} \end {midpage} \end {landscape} } \end {document}
生成的效果如图,可见横置页丝滑插入段落中,没有产生大面积空白
使用\nopagebreak表示禁止在此处断页。
此外,还可以使用
1
2
3
4
5
6
7
8
9
10
11
\usepackage {parskip}\AddToHook {env/samepage/begin}{\AddToHook {para/before}{\nopagebreak }\AddToHook {para/after}{\nopagebreak }} \begin {samepage}在一页的第一段 在一页的第二段 \end {samepage}
另两个段落出现在同一页。
参考这篇文章https://tex.stackexchange.com/questions/74353/what-commands-are-there-for-horizontal-spacing
1
2
3
4
5
6
7
8
9
10
11
12
13
14
15
16
17
18
19
20
21
22
23
24
25
26
27
28
29
30
31
32
33
34
35
36
37
38
39
40
41
42
43
44
45
46
47
48
49
50
51
52
53
54
55
56
57
58
59
\documentclass {article}\usepackage [margin=1in]{geometry}\setlength {\parindent }{0pt}\begin {document}There are a number of horizontal spacing macros for LaTeX: \begin {tabular}{lp{5cm}} \verb |a\,b | & a\, b \quad $ a\, b$ \\ \verb |a\thinspace b | & a\thinspace b \quad $ a\thinspace b$ \\ \verb |a\!b | & a\! b \quad $ a\! b$ \\ \verb |a\negthinspace b | & a\negthinspace b \quad $ a\negthinspace b$ \\ \verb |a\:b | & a\: b \quad $ a\: b$ \\ \verb |a\>b | & a\> b \quad $ a\> b$ \\ \verb |a\medspace b | & a\medspace b \quad $ a\medspace b$ \\ \verb |a\negmedspace b | & a\negmedspace b \quad $ a\negmedspace b$ \\ \verb |a\;b | & a\; b \quad $ a\; b$ \\ \verb |a\thickspace b | & a\thickspace b \quad $ a\thickspace b$ \\ \verb |a\negthickspace b | & a\negthickspace b \quad $ a\negthickspace b$ \\ \verb |$a\mkern\thinmuskip b$ | & $ a\mkern \thinmuskip b$ (similar to \verb |\, |) \\ \verb |$a\mkern-\thinmuskip b$ | & $ a\mkern -\thinmuskip b$ (similar to \verb |\! |) \\ \verb |$a\mkern\medmuskip b$ | & $ a\mkern \medmuskip b$ (similar to \verb |\: | or \verb |\> |) \\ \verb |$a\mkern-\medmuskip b$ | & $ a\mkern -\medmuskip b$ (similar to \verb |\negmedspace |) \\ \verb |$a\mkern\thickmuskip b$ | & $ a\mkern \thickmuskip b$ (similar to \verb |\; |) \\ \verb |$a\mkern-\thickmuskip b$ | & $ a\mkern -\thickmuskip b$ (similar to \verb |\negthickspace |) \\ \verb |a\enspace b | & a\enspace b \\ \verb |$a\enspace b$ | & $ a\enspace b$ \\ \verb |a\quad b | & a\quad b \\ \verb |$a\quad b$ | & $ a\quad b$ \\ \verb |a\qquad b | & a\qquad b \\ \verb |$a\qquad b$ | & $ a\qquad b$ \\ \verb |a\hskip 1em b | & a\hskip 1em b \\ \verb |$a\hskip 1em b$ | & $ a\hskip 1em b$ \\ \verb |a\kern 1pc b | & a\kern 1pc b \\ \verb |$a\kern 1pc b$ | & $ a\kern 1pc b$ \\ \verb |$a\mkern 17mu b$ | & $ a\mkern 17mu b$ \\ \verb |a\hspace{35pt}b | & a\hspace {35pt}b \\ \verb |$a\hspace{35pt}b$ | & $ a\hspace {35pt}b$ \\ \verb |axyzb | & axyzb \\ \verb |a\hphantom{xyz}b | & a\hphantom {xyz}b (or just \verb |\phantom |) \\ \verb |$axyzb$ | & $ axyzb$ \\ \verb |$a\hphantom{xyz}b$ | & $ a\hphantom {xyz}b$ (or just \verb |\phantom |) \\ \verb |a b | & a b \\ \verb |$a b$ | & $ a b$ \\ \verb |a\space b | & a\space b \\ \verb |$a\space b$ | & $ a\space b$ \\ \verb |a\ b | & a\ b \\ \verb |$a\ b$ | & $ a\ b$ \\ \verb |a{ }b | & a{ }b \\ \verb |$a{ }b$ | & $ a{ }b$ \\ \verb |a~b | & a~b \\ \verb |$a~b$ | & $ a~b$ \\ \verb |a\hfill b | & a\hfill b \\ \verb |$a\hfill b$ | & $ a\hfill b$ \end {tabular}\end {document}
其中,可以在公式环境内部调整间距。
1
2
3
4
5
6
\begin {equation}\thinmuskip =3mu\medmuskip =4mu plus 2mu minus 4mu\thickmuskip =5mu plus 5mua + b = c \end {equation}
最后,align环境调整行距,只需在\\之后加[行距]即可。
1
2
3
4
\begin {align*} f(x)=x^ {2}-2x+1\\ [10pt] f(x)=(x-1)^ {2} \end {align*}